

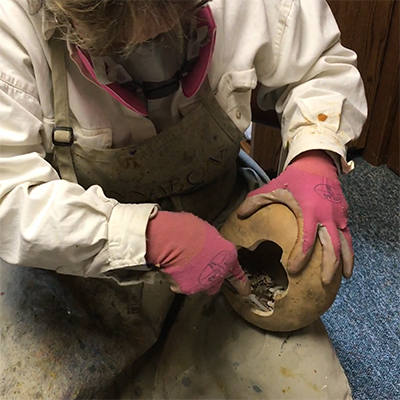

The process of transforming a dirty gourd into a piece of art is labor intensive. The first step is to clean the outside of the gourd to remove the dirt and mold and let it dry overnight. Once the gourd has dried, I use a handheld saw to cut open the gourd. I always use work gloves and a dust mask for protection. After the gourd is opened, I scrape out the dried seeds and membrane. The edges are then sanded and once again the gourd is cleaned inside using soapy, bleach water and allowed to dry overnight.


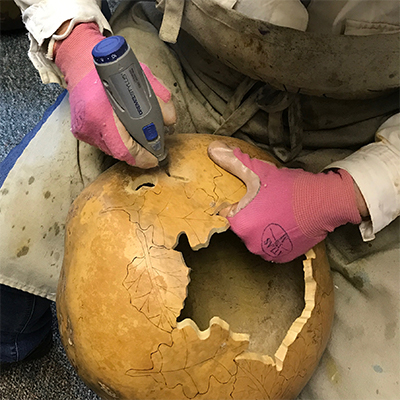
To embellish a gourd, I may use a wood burner to draw leaves and other decorations. In order to achieve the deep rich colors that I love, I use Fiebing leather dyes. Once dried, usually a day, I may further enhance the gourd using metallic ink dyes or Gilder's paste. Again, the gourd is dried overnight and then 3-4 coats of Polycrylic is applied and dried.


In order to weave on a gourd, I mark the holes with an awl and use a Dremel to drill the holes. I may also use a Dremel to carve fretwork into a gourd. Because gourds are so lightweight, I melt beeswax into the bottom of the gourd. After the beeswax hardens it gives the gourd some weight and stability. Then, I line the inside of the gourd with handmade mulberry paper. Finally, I weave onto the gourd using Danish cord or long leaf pine needle and beads. As you can see, the time and effort involved in producing gourd art is a labor of love.